Wednesday, March 19, 2014
Changes to our blog & tutorials
Within the next day or two our blog and tutorials will be moving to a spot on our own web host. We will publish the new blog address as soon as the change is ready. -Patrick
Tuesday, October 1, 2013
Wednesday, September 25, 2013
Blocking out Pistol Molds for Weaponlight Holsters
One of the
great things you can do when you make a holster for yourself is to make for
YOUR pistol with YOUR accessories and make it work with YOUR carry
preference. One of the most popular
accessories is the rail mounted weapon light/laser. Because of the number of different pistol
brands and models compounded by the plethora of weapon lights, most
manufacturers do not support the vast majority of possible gun/light
combinations out there. This tutorial
will give you a start on making your own weapon light capable holster.
The primary
problem when molding weapon light holsters is how to create a void in the
holster that will allow the light to pass through and still cover the trigger
guard effectively.

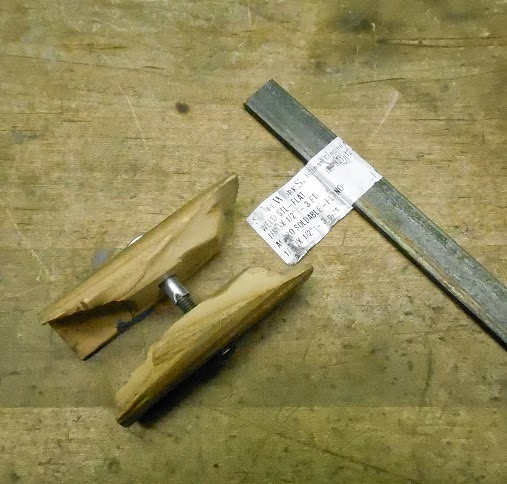
You can see
in the above picture that there is a cylinder shaped void behind the light body
and a rectangular void behind the light mount.
This allows the light to pass in and out of the holster with minimal
drag. There are a number of ways to
create this with simple items around the house.
I’ve seen
people use lengths of PVC pipe cut in half for the cylindrical block and I’ve
seen all sorts of wooden or Kydex sticks for the rectangular block. For several years I used a simple 1.25”
diameter wooden dowel that I cut and carved myself for the cylindrical block
and some steel welding stock for the rectangular block. You can find these raw materials at most any
hardware store.
This set up
worked pretty well and allowed me to make functional holsters for myself and my
friends. But the wooden block was
fragile and didn’t last very long which meant I had to remake it. That and the cross bar attachment was easy to
use, but it made the holster a little ugly.
I decided to try and make a better option.

I found a
hobby shop that sold nylon rods in the same 1.25” diameter that I had been
using. I carved and cut out the nylon
rods pretty much the same way as I had the wooden dowel. I used a drill press and a 1” bit to create
the hollow that covers the switches.
Then I bisected the rod on a band saw and sanded about 1/8” of material
away on the inside face. Then carved
away the tail end to clear the grip of the weapon. I also chopped ¼” off the top side so the
steel bar would sit flat next to the rod.
Then I taped
them to the pistol instead of using a cross bar which gave me a much cleaner
look in the finished mold.


This set up
has work perfectly for me and it should for you too. The nylon rod is bomb proof and looks the
same today as when I first started using it.
It will flex a bit in the mold, but it pops right back into shape for
the next project.
The steel
bar stock works great too and you can cut the ends to add functional or
aesthetic shapes to your holster.
This system
works so well we’ve decided to make so to sell it on our sales site. We’ve acquired a basic mill and lathe to cut
these out for you. You might need to
trim a bit for various weapons, but they will fit the most common pistols and
lights out there. We also plan on
selling just the raw nylon rod as well if you want to try your hand at making
your own out of this super-durable material.
But even if
you choose not to buy our pre-made blocks, you’ll be able to duplicate our
method at home when you do it yourself!
Now available for sale at DIY Holster's website


Subscribe to:
Posts (Atom)